Setup MobilePush Apps
Create your apps in Marketing Cloud
Your development, test, and deployment process is best accomplished by creating two unique MobilePush apps
- one for development (utilizing Apple’s push sandbox)
- one for production (targeting Apple’s production push system).
Before starting, make sure you have provisioned your app for push notifications with either a .p8 Auth Key File (Recommended) OR a .p12 certificate as outlined in our Provision for Push document.
Follow these steps to create new MobilePush apps (Repeat steps to create both a development and production app):
- Log in to Marketing Cloud MobilePush.
- Highlight the Mobile Studio menu and choose MobilePush from the dropdown.
- On the top, select the Administration tab and click Create New App in the upper right corner.
-
Enter the name and description for the app.
Development app name suggestion:
[App]_DEV-APNS.
Production app name suggestion:[App]_PROD-APNS.
Provisioned with p8 Auth Key (Recommended):
- Click Choose File and upload the icon for the MobilePush app.
-
Upload the previously created .p8 Auth Key File by clicking Choose File and choose the Auth Key on your computer to upload. This key will work for both Production and Development apps. To distinguish the difference for your app use the radio buttons described below as follows:
Development app: Select the Development APNs Environment radio button.
Production app: Select the Production APNs Environment radio button.
Validate the correct Auth Key File is uploaded. This should be a text file with a .p8 file extension. Not the signing certificate used to provision your application for AdHoc or App Store deployment.
- Enter in the 10-character Key ID, this is usually the name of the .p8 text file after it is created or it can be viewed in your Apple Developer Account.
- Enter in the 10-character Team ID associated with this Key. The team ID can be found in the Membership tab in your Apple Developer Account.
- Enter in the Bundle Identifier of the app you are building.
- Make any applicable changes to the optional settings.
- Note and copy the
Access Token,App IDandApp Endpoint. These values will be used to configure the SDK for development testing.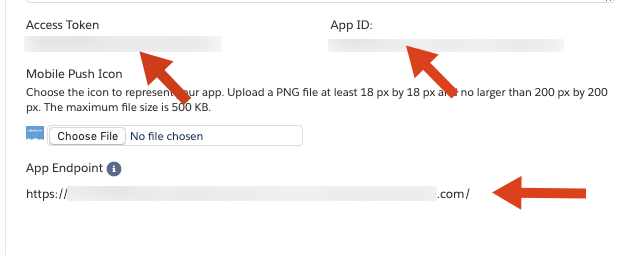
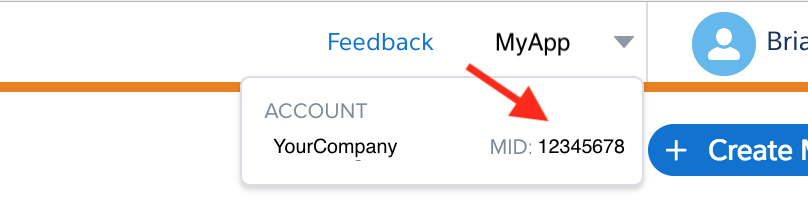
- Select your account name in the upper-right corner of the MobilePush Administration site and note and copy the “MID” value (numbers only).
- Click Save.
- OR -
Provisioned with p12 Certificate (Requires yearly renewal):
Follow these steps to create new MobilePush apps:
- Click Choose file and upload the icon for the MobilePush app.
-
To upload an APNS certificate, click Change and choose the certificate on your computer to upload. Enter the password for the certificate.
Development app: upload the iOS Apple Push Notification service SSL (Sandbox) .p12 file created following the directions in Provision for Push.
Production app: upload the Apple Push Notification service SSL (Sandbox & Production) .p12 file created following the directions in Provision for Push.
Validate correct certificate is uploaded. The certificate should be for Push Notifications (APNS), not the signing certificate used to provision your application for AdHoc or App Store deployment. Double-check to ensure that the certificate uploaded is a valid, current APNS (push) certificate, as they expire after 1 year.
- Make any applicable changes to the optional settings.
- Note and copy the
Access Token,App IDandApp Endpoint. These values will be used to configure the SDK for development testing. - Select your account name in the upper-right corner of the MobilePush Administration site and node and copy the “MID” value (numbers only).
- Click Save.
Review MobilePush documentation for more information.